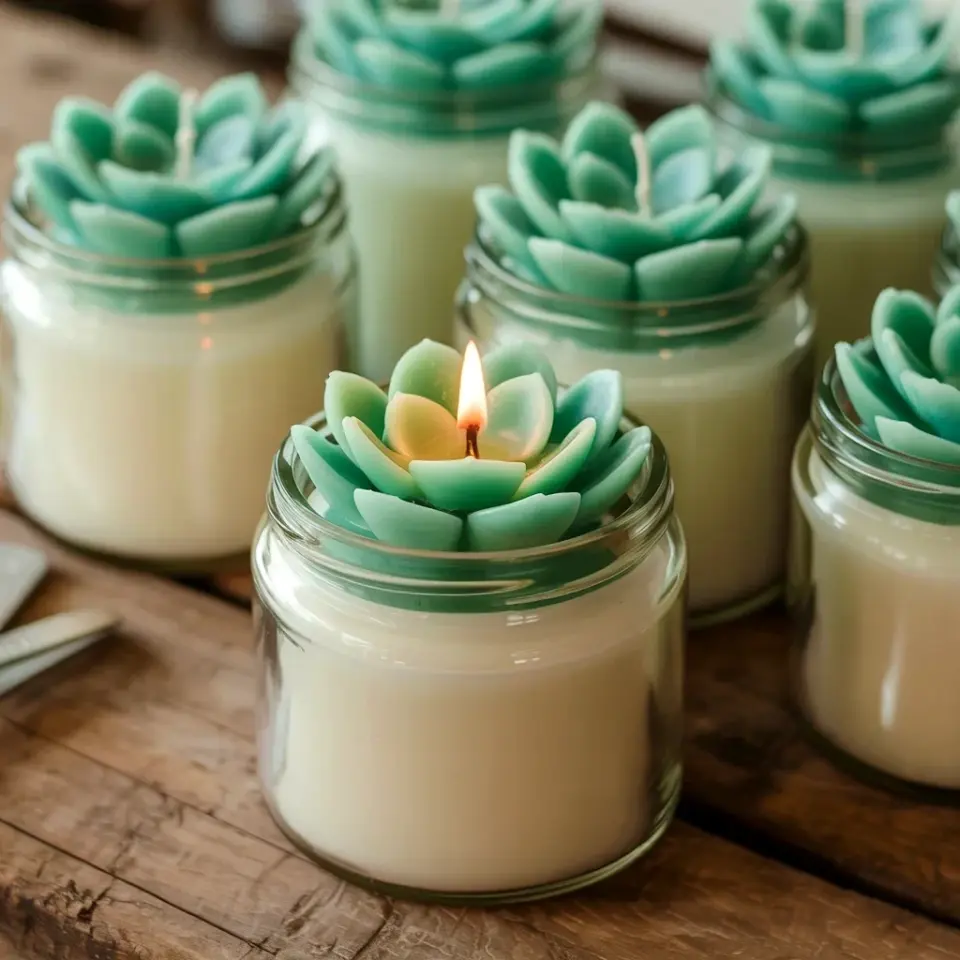
Scroll through any candle decor board and you’ll see them, the tiny faux succulent arrangements that look almost alive. The succulent candle project from BrambleBerry is the reason that whole aesthetic is everywhere, and honestly, I get the hype. But before you click away thinking it’s another pricey craft kit with a premium brand tag, let me tell you how I made mine for under twenty bucks. I’m a tight budget kind of person, and I refuse to let a pretty candle become a splurge.
I tested this project twice, once with the official BrambleBerry supplies and once with stuff I scrounged from a local craft store. The results were close enough that my own mother couldn’t tell the difference. So here’s the real breakdown, with every workaround I found, so you can decide if you want to go full name brand or keep it lean.
What this succulent candle project actually involves
It’s not a complicated build. You’re essentially making wax leaves that look like the fleshy petals of a succulent, then attaching them around a regular candle pillar. The BrambleBerry version uses their silicone molds and a specific blend of soy wax, but the principle is the same with any mold that has leaf-shaped cavities.
The final piece looks like a candle wearing a botanical corset, and that’s precisely the charm. It’s a decorative sleeve, not a container candle. You can pop it over any pillar candle you already own, which makes it a surprisingly practical decor item.
What I didn’t expect was how meditative the process is. Melting wax, pouring it into molds, waiting for each leaf to set. There’s a rhythm to it that I found genuinely calming, even when my first batch looked like lumpy gray potatoes.
Budget shopper’s supply list for your candle decor
Here’s where things get interesting. The BrambleBerry kit includes all the essentials, but you don’t need their exact set to get a good result. Look, craft stores carry most of this individually, and online marketplaces have cheap alternatives.
Here’s what I actually used for my budget version:
– A pack of leaf-shaped silicone molds (six cavities, under $9 online)
– One pound of soy wax, the same kind used for container candles (about $11)
– A cheap pillar candle from the discount aisle ($4, no shame)
– A small bottle of liquid candle dye, though you can skip it if you want white leaves
– A heat-safe pouring pitcher, but I used a clean glass jar in the microwave and it worked fine
The price difference matters. BrambleBerry’s full kit costs around $60 with shipping, and my scrappy version came in at roughly $24 because I already had a microwave and a measuring cup. If you’re a beginner who wants zero guesswork, the brand kit is nice. But if you’re like me and you enjoy a little improvisation, the DIY route is completely doable.
Making wax leaves without losing your mind
Ok so the first time I tried this, I melted the wax too hot and it splattered everywhere. My own fault, I was rushing. Let the wax get to the temperature your specific brand recommends, but for most soy waxes that’s around 180 degrees Fahrenheit. Not boiling, just fully liquid.
Pour slowly into the molds. Here’s the thing, you want to overfill slightly because the wax shrinks as it cools. Then wait. Patience is the whole game. I waited about twenty minutes before peeling the leaves out, and they came out clean with crisp edges.
One honest complaint: some of my thinner leaves snapped right at the base when I popped them too early. The fix is simple, leave them alone longer. I learned to set a timer and go do something else, like cleaning my sink. Without that patience, you’ll get a pile of broken green shards instead of lovely wax petals.
Arranging your succulent candle so it looks intentional
The arrangement matters just as much as the leaves. If you just glue them on at random angles, the candle looks like a science project. A real aesthetic candle has that spiral pattern that real succulents grow in.
Start at the bottom of your pillar and work upward. Each leaf should overlap the one below it, like roof tiles or fish scales. I used a low-temp glue gun, which is key because a hot one will melt the wax candle underneath. That would ruin everything, and I speak from experience with a misshapen blob that looked like a sad melted snowman.
For the top layer, angle the leaves inward toward the center. It gives that rosette effect that makes people say, wait, those are real? No, they’re not, but the illusion is strong. You can leave a little wax candle wick poking out from the center, or cover it entirely if the candle is purely decorative.
Cheaper alternatives to the BrambleBerry kit (and where to scrimp)
Not gonna lie, the BrambleBerry brand sells a really polished product. Their molds are sturdy, their wax is high quality, and their instructions are clear. But for this one project, you can absolutely substitute without any tragedy.
Here are the swaps that saved me the most money:
– Use any leaf-shaped ice cube tray that’s heat-resistant. I found one at a dollar store that works fine.
– Skip the fancy liquid dye. A few drops of natural food coloring mixed into melted wax works, though the color fades faster.
– Instead of a wick cutter, just use the scissors from your kitchen drawer. Just wipe them after, obviously.
– Buy a plain white pillar candle in bulk. A six-pack costs the same as one fancy candle from a boutique.
One thing I wouldn’t skip is the low-temp glue gun. That is a real safety issue, not a cost-saving opportunity. A standard high-temp gun will melt your candle base and also burn your fingertips. I have a small scar on my thumb to prove it.
Making your succulent candle decor last longer than a week
Here’s the hidden problem nobody tells you about, wax leaves are delicate. They’re not going to hold up forever if you touch them constantly, and dust settles into all those little crevices. The good news is that you can preserve them with a very light coat of clear matte acrylic sealer. Spray it on from about a foot away, and it creates a subtle barrier.
Also, don’t actually light this candle. I mean, you can, but the flame will melt the leaves and ruin the whole design. Treat it as a decor piece, not a functioning candle. If you want a scented version, place the whole arrangement on a candle warmer instead. Or just enjoy the look and know that you made something with your hands.
I keep mine on a shelf near the window, and the light catches the wax in a way that looks genuinely organic. It’s become one of my favorite conversation starters, mostly because people cannot believe it’s not a real plant.
The final verdict on this DIY candle project
For the time and money, the succulent candle project from BrambleBerry is a satisfying make, and the budget version I built roughly twenty minutes ago (read: this week) turned out just as charming. You get the visual payoff of a high-end candle decor piece without paying boutique prices. If you like tactile crafts with a bit of a learning curve, this one will keep your hands busy for a good afternoon.
My advice is to start with cheap molds and see if you enjoy the process. If you end up hooked, then you can invest in the BrambleBerry upgrade. Either way, you’ll have a cute little candle that looks nothing like what your friends expect from a craft project. Try it once, and I think you’ll surprise yourself with how professional the final result looks.
This post was researched and drafted with AI assistance, then personally reviewed and edited by Diana before publishing.
Leave a Comment