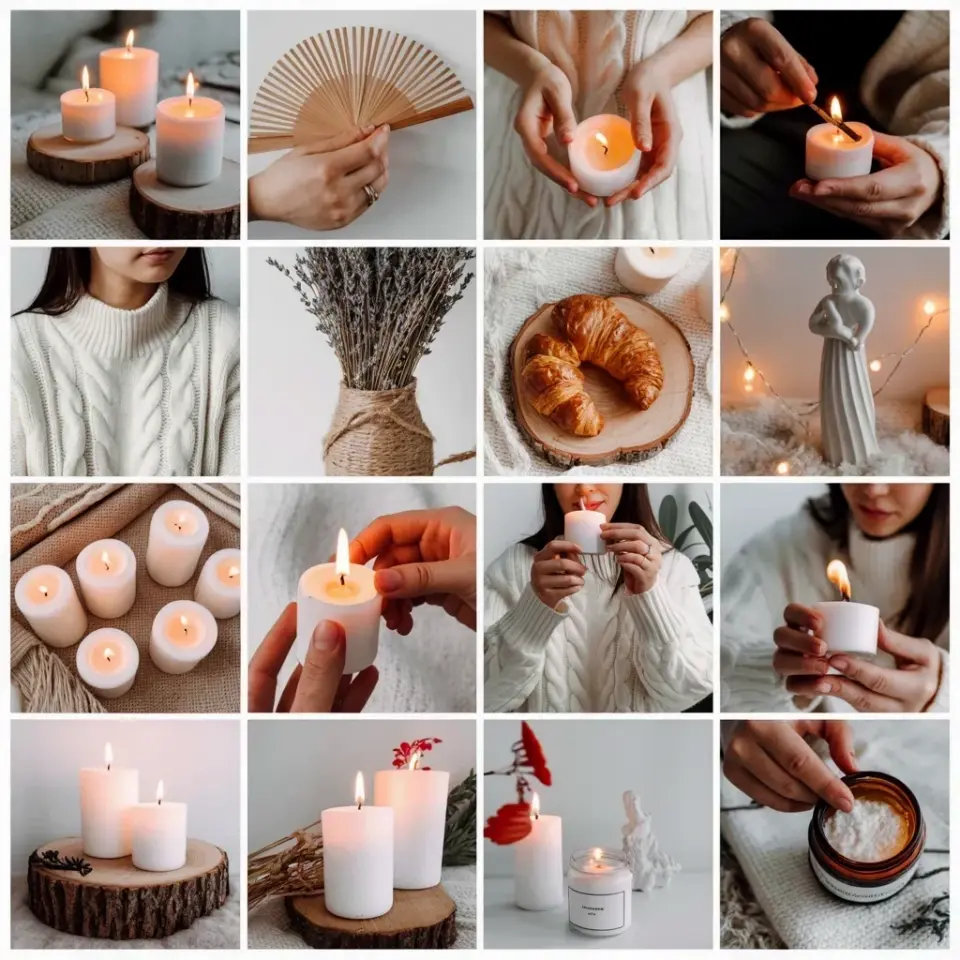
The handmade soy wax candles visual I finally posted on Instagram last Wednesday wasn’t staged for hours. It took maybe twelve minutes. But it got more saves than any product photo I’ve ever put up, which made me rethink everything I thought I knew about candle styling.
I make soy candles in my kitchen. Small batches, simple glass jars, wooden wicks that crackle like a tiny fireplace. For months I avoided photographing them because I thought I needed a fancy camera or a styled studio. Then I realized my phone camera plus a few weathered objects from around the house did the job better. Honestly, the rawest shots performed the best.
Why Candle Photography Works Best With Real Texture
Flat backgrounds are fine, but they don’t tell a story. A candle next to a smooth white wall looks like a product listing. The same candle sitting on a scratched wooden board looks like a moment. That’s the difference I kept noticing in my own feed and in the candle accounts I follow.
Texture gives the eye somewhere to rest. It also makes the wax look softer, warmer, more inviting. If your candle is smooth, put it against something rough. A linen napkin, an old book, a piece of raw wood. You don’t need much.
One thing I learned the hard way: don’t mix too many textures. A chunky knit blanket plus a burlap placemat plus a wooden board plus a dried flower arrangement starts to feel chaotic. Pick one dominant surface and one accent fabric. Two, maximum three. That’s it.
Building a Scene With Wooden Boards and Dried Flowers
My go-to setup is a wide oak board that my grandfather cut years ago. It has a water stain in one corner and a nail hole in the other, and I refuse to sand them out. Those flaws make every photo feel less like a perfectly curated ad and more like a real life table.
Dried flowers are the easiest styling companion for a soy candle. They don’t wilt under hot lights, they don’t need water, and they bring a soft organic line that contrasts with the straight glass jar. I use dried eucalyptus and a few stems of lavender. Sometimes I scatter loose petals around the base of the candle, just a few, like they fell naturally.
Here’s a funny thing: my cat once stepped through the whole arrangement and knocked half the petals onto the floor. I snapped a photo anyway, mostly as a joke. That picture with the chaos in the background got more comments than my careful setups. So now I leave the cat’s mess in the frame sometimes. It works.
For a quick styling checklist, try this:
- One wooden board or tray with visible grain and stains
- A small bunch of dried flowers or a single branch
- One textured textile like a linen napkin or chunky knit throw
- A candle warmer lamp or a matchbox that adds a human touch
- Natural light from a window, never overhead ceiling light
The One Lighting Trick That Changed My Candle Photos
For a long time I kept turning on all the lights in the room, then wondering why my candle photos looked flat and yellow. One afternoon I turned everything off except a small bedside lamp placed behind the jar. The glow came through the wax in a completely different way, soft and honey-toned, and the shadows fell forward in long gentle lines.
Window light works even better. Put the candle on a board near a north-facing window, turn off all artificial lights, and shoot from a slight angle. The light will skim across the texture instead of hitting it straight on. That’s the whole secret. I’m not a photographer by any stretch, but this trick made my candle visuals look like I knew what I was doing.
Another tip: don’t light the wick for every shot. An unlit candle shows the smooth ivory surface of the soy wax. A lit candle creates a warm, atmospheric glow. Both are useful. But if you photograph the same candle in both states, you’ll get two entirely different moods with zero extra effort.
Styling Handmade Candles as Gift Ideas for Your Feed
One of the best ways to use candle photography is to show a candle as a gift. Wrap a piece of twine around the jar, tuck a small sprig of fresh rosemary under the string, and place it on the board with a handmade card. That reads as thoughtful and personal. People love seeing packaging they can recreate at home.
You can also style a candle next to other small gifts, like a matchbox, a bar of soap, or a little jar of honey. Arrange them loosely, not in a perfectly straight line. Imperfection looks more human. And honestly, when I posted a candle styled with a tiny stack of old letters, someone immediately asked if the letters were included in the gift. They weren’t, but the idea stuck.
If you sell candles, or you’re thinking about making them as gifts for friends and family, photograph them with props that suggest the recipient’s personality. A book and a coffee mug for a reader. A gardening glove and a trowel for a plant person. It’s a small touch, but it makes the gift feel specifically chosen.
Three Practical Candle Styling Rules I Use Every Time
Rule one: keep the candle the star. Props should frame it, not compete with it. If the viewer sees the blanket before the candle, you’ve gone too far. Rule two: shoot from an angle, not straight down. Overhead shots can be pretty, but a 45 degree angle shows both the side of the jar and the rim of the wax. It feels more intimate.
Rule three: leave some empty space in the frame. A cluttered photo feels stressful, especially on a small phone screen. Let the wooden board breathe. Let the candle sit slightly off center. That asymmetry makes the image look candid, like a moment stolen from a cozy afternoon, not a staged advertisement.
Also, don’t forget to clean the jar. I spent twenty minutes once photographing a candle with a dusty rim. It looked fine in the viewfinder, but zoomed in, the dust was everywhere. A microfiber cloth and a quick wipe of the outside before every shoot saves you a lot of editing time later.
How to Keep Your Candle Visuals Honest and Uncluttered
There’s a temptation to overstyle. I do it all the time. I add one more flower, one more ribbon, one more prop, and suddenly the photo looks like a hoarder’s shelf. Real restraint is harder than adding stuff. Walk away from the setup for two minutes and come back with fresh eyes. If anything seems unnecessary, remove it.
Look, the best soy wax candle photos I’ve taken were the ones where I forgot to add something. The ones where I just put the candle on the board, opened the window, and pressed the shutter. Those are the images that feel calm and quiet. They also match the actual experience of lighting a candle, which is a small ritual of slowing down.
One weird detail I’ll admit: I keep a vintage ceramic mushroom in my prop box. It’s maybe two inches tall and has a chip on its cap. I have no idea where it came from. But it shows up in about half my candle photos, and people always ask about it. It’s become a signature. I never planned that, it just happened.
Anyway, don’t be afraid to let a random object become your visual trademark. It makes your feed feel like you, not like a template that fifty other candle accounts are using.
The Best Candle Styling Trick Is Still Just Natural Light
If you remember nothing else from this, remember that. Natural daylight, a simple prop, and a candle with a slightly uneven wax surface. That’s all you need to make your handmade soy wax candle visual stand out on Instagram. No expensive equipment, no elaborate backdrops, no pro styling tools.
My favorite time to shoot is late afternoon, when the sun comes through the window at an angle. That light gives everything a golden edge, and the wax picks up warm highlights that make it look almost luminous. I’ve taken perfectly good photos at noon too, but the late afternoon light does something special.
Are you going to try this with one of your candles? I’d genuinely love to know. If you have a favorite prop or a weird little object that always finds its way into your photos, share it. Or just go light one of your candles and shoot it on whatever board, tray, or table you have nearby. You might surprise yourself with what you create.
This post was researched and drafted with AI assistance, then personally reviewed and edited by Diana before publishing.
Leave a Comment