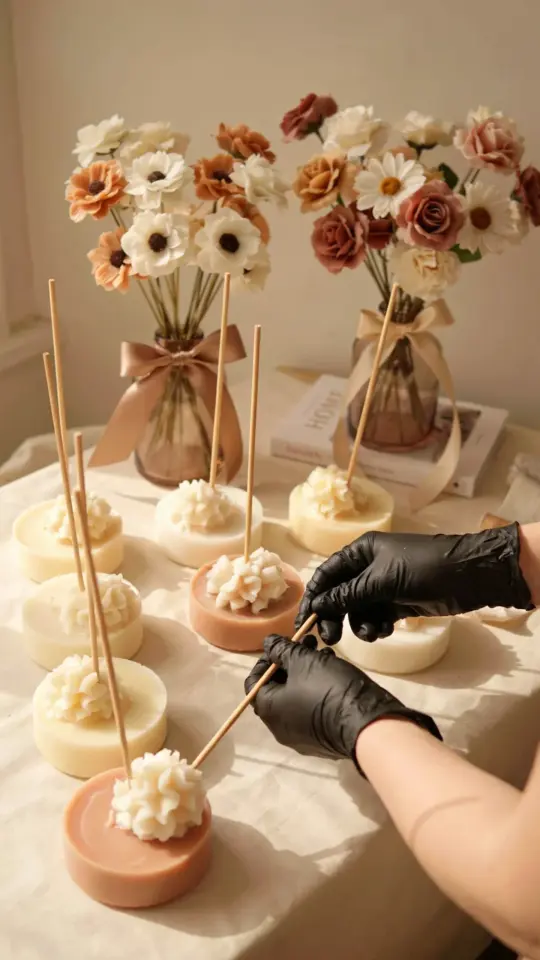
Honestly, before I made my first batch, my living room felt like a waiting room. Beige walls, a beige couch, and a single sad candle on the coffee table. Then I stumbled across a video of someone dipping fabric into wax to make fake flowers, and a lightbulb went off. I thought, what if I could make a whole bouquet of candles that actually burn? That’s how my DIY flower candles obsession started. It completely changed the vibe in here. Now I have a tiny garden sitting in a glass vase on my mantle, and it smells like a spring meadow. Not gonna lie, it took a few tries to get the petals right. But once you understand the method, it’s surprisingly simple. And yes, they really do burn.
Why flower candles instead of regular ones?
You can buy a jar candle anywhere. But a candle bouquet? That’s something people stop and ask about. The visual is just different. You get layers of color, texture, and light all at once. Plus, you control the scent. I mix lavender with a tiny bit of vanilla for a cozy but not cloying vibe. Another reason I love them: they make ridiculously good gifts. I gave one to my aunt and she texted me, “Is this real? It looks like a painting.” That’s the kind of reaction you don’t get from a store-bought pillar.
Look, there’s also the bonus of using up leftover wax from other projects. I hoard tiny scraps of colored wax, and this project eats them up. So it’s thrifty in a weird way. And honestly, there’s something meditative about building a flower petal by petal. It’s like origami but with wax and a little heat.
Supplies you’ll need for your own candle bouquet
Ok, before we dive into the steps, let’s talk gear. You don’t need a lot of fancy equipment. Here’s what I use:
- A high-quality paraffin or soy wax blend (I prefer a mix: 70% paraffin for a clean burn, 30% soy for a nice opaque finish).
- Candle dye blocks or liquid dye in whatever colors you want. I started with pink, white, and a dusty sage green.
- A small pouring pot and a heat source like a hot plate or a double boiler on the stove (never microwave wax, it can overheat dangerously).
- Flower-shaped silicone molds. I use a set I found on Etsy that has individual petals and a center disk.
- Candle wicks with metal sustainer tabs. Get the pre-tabbed ones, it’s way easier.
- A heat gun or an old hair dryer (I use a cheap heat gun from a craft store).
- A glass vase or a wide-mouth mason jar for the final arrangement.
- And here’s my weird little pro tip: a pair of tweezers. You’ll need them to place tiny petals without burning your fingers.
Oh, and one more thing. A baking sheet lined with parchment paper. You’ll drip wax, you’ll drop petals, and you’ll be grateful for easy cleanup. Trust me on that.
Step one: prep your molds and wax
Start by setting your silicone molds on a flat, stable surface. I put mine on a wooden cutting board so they don’t slide around. Then melt your wax in the pouring pot. Aim for about 175 degrees Fahrenheit, not hotter, unless you want bubbles and shrinkage. While that’s heating, thread a wick through the center of each flower mold, letting the tab sit in the bottom. Honestly, this part is fiddly. I hold the wick in place with a piece of tape across the top of the mold so it stays centered. Because the wax will try to push it sideways.
Now pour a thin layer of wax into the mold, just enough to cover the bottom. Let it set for about a minute, then use a skewer to gently swirl the wax up the sides of the mold. This creates the first petal shape. I know it sounds messy, but it’s forgiving. If you mess up, just reheat and pour again. I’ve done that more times than I care to admit. The key is to let each layer cool slightly before adding the next one, otherwise they blend into a blob.
Step two: build the flower petals layer by layer
This is where the magic happens. After the first thin layer has firmed up (it should still be slightly tacky), you pour your second layer, but this time in a different color. I do a white base and then a pink top. The trick is to tilt the mold as you pour so the colored wax coats only one side, creating a gradient. Then, when you add the third layer, you press in tiny pre-made petal pieces (from another mold) while the wax is still warm. That’s how you get those realistic overlapping petals. It’s like a sculpture.
I’ll be honest, the first time I tried this, my flower looked like a deformed cabbage. But I kept going. You have to work quickly because wax hardens fast. I use a heat gun to warm the edges of the mold if a layer solidifies too soon. And here’s a random detail: the room temperature matters. If it’s too cold, the wax cracks. If it’s too warm, it takes forever to set. I aim for a cozy 72 degrees. Anyway, layer until the mold is almost full, leaving a small well in the center for the wick. Then pour a final half-inch of clear or translucent wax to seal everything together. Let it cool completely before unmolding.
Step three: assemble the bouquet in a vase
Once your flowers have hardened, pop them out of the molds. They should release with a satisfying little snap. You’ll probably have a few rough edges. I trim those with a sharp knife or a pair of scissors. Now arrange them in your vase. I start with the tallest flower in the middle, then shorter ones around it, and maybe a couple of small buds leaning outward. If the stems seem wonky (they’re just wicks sticking out from the bottom), you can trim them with wire cutters. But honestly, I leave the wicks a bit long and curl them into a little loop for a decorative look. Totally optional.
Here’s a tip that saves me every time: fill the bottom of the vase with a layer of glass pebbles or sand. It holds the flowers upright and hides the wick ends. Plus it looks like tiny soil, which is cute. Not gonna lie, I spent a whole afternoon repositioning petals because they kept tipping over. The pebbles fix that. And if you want the bouquet to feel fuller, add a few loose petals scattered around the base. Just don’t let them touch the wicks when you light the candles.
Safe burning tips for your flower shaped candles
Look, these are real candles, they burn, but they’re different from a standard pillar. The flames can be uneven because of the petal shapes. Here’s what I learned the hard way. First, always burn them on a heat-proof surface. A plate or a ceramic dish works. Second, trim the wicks to about a quarter inch before lighting. If you leave them long, you’ll get a tall, sooty flame that might melt a petal too fast. Third, don’t leave them unattended. Ever. I know that’s true for all candles, but with flower shapes, the wax pools can get deep and might overflow if you’re not watching.
Also, don’t light more than two or three at a time in a bouquet. The concentrated heat can cause the whole arrangement to sag. I light the center one and one on the edge, and let them burn for no more than two hours. Here’s a weird thing I noticed: the scent throw is actually better than a regular jar candle because the open petals allow the fragrance to release faster. So you get a strong aroma without it feeling overwhelming. And yes, they self-extinguish eventually because the wax pool gets too wide and drowns the wick. That’s fine, just let it cool and relight later.
A few design variations to try
Once you get the hang of the basic flower, you can riff on it endlessly. I made a batch with layered ombre petals (dark purple to light pink) and it looked like something from a botanical garden. Another time I added a tiny pinch of dried lavender buds into the wax while it was still soft. The texture was nice, but it clogged the wick a bit, so go easy. You can also embed small dried flower heads inside the wax for a pressed-flower effect. Just dip them in melted wax first so they don’t burn when the candle is lit.
If you’re feeling ambitious, try making a rose shape by pouring wax in concentric circles and gently pulling the edges with a toothpick while it’s still warm. Honestly, that technique is fiddly and I’ve only succeeded twice. But the result is gorgeous. Or keep it simple: make plain tulip shapes in a single bright color and group them in a short, wide bowl. That’s my go-to for a quick weekend project. And if you mess up, just remelt the wax and start over. There’s no waste, only lessons.
Making your own flower candle bouquet is one of those projects where the process is almost as satisfying as the result. The first time you light one and the petals glow from within, you’ll understand why I couldn’t stop at just one. Try it this weekend, even if you’re a complete beginner. You’ll end up with something handmade, burnable, and totally unique to your space. And if you make a funny-looking cabbage flower, that’s fine too. That’s just character. Happy crafting, and don’t forget to wash the wax out of your hair afterward (ask me how I know).
#candlecraft #diycandles #flowercandles #handmadehome #candlebouquet
This post was researched and drafted with AI assistance, then personally reviewed and edited by Diana before publishing.
Leave a Comment