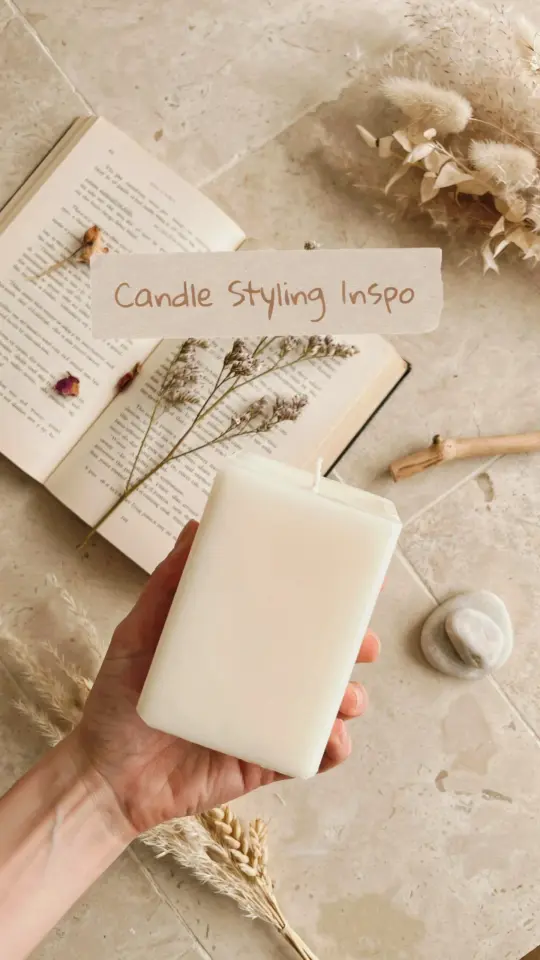
You might think decorating candles with dried flowers is complicated or expensive. I used to think the same. But one afternoon I tried pressing dried ornamental grass onto a plain white pillar candle using just an iron and parchment paper. The before and after difference was so dramatic I had to share this DIY floral candle transformation. It is one of the easiest candle decorating ideas I have tried, and the result looks like something from a high end boutique. If you want a natural, textured look without any glue or mess, this method is for you.
Why Press Dried Flowers on Candles Instead of Gluing Them?
Many tutorials show you how to glue dried petals onto wax, but gluing often leaves lumps, bumps, and white residue. Pressing flowers directly into the wax creates a smooth, embedded finish that looks like the flower grew there. The heat from the iron melts a thin layer of wax, and the flower sinks in slightly. This method also keeps the flower secure; it will not peel off or shed petals as easily. I have also found that pressed flowers last longer on the candle because they are sealed in wax. Plus, there is no glue smell or sticky cleanup. It is a cleaner, more elegant approach to candle decoration.
What You Need for This DIY Floral Candle Project
The material list is short, and you probably already have most of these items at home. Here is exactly what you need:
- A plain candle (pillar candles work best because they have a flat or slightly curved surface; avoid tall tapers with narrow tops)
- Dried flowers or ornamental grasses (more on choosing them below)
- Parchment paper (wax paper can stick; stick with parchment)
- A household iron (any basic iron works; no steam needed)
- A flat, heat safe surface (like a cutting board or an old towel)
- Tweezers or small scissors for positioning delicate flowers
That is it. No special tools, no adhesives. The whole project can be done in under 20 minutes once you have your flowers ready.
Choosing the Best Dried Flowers and Grasses for Candle Decor
Not every dried flower presses well into wax. You want thin, flat, or naturally pressed pieces. Thick flower heads, like rosebuds or large zinnias, will not flatten properly and may create bumps. Instead, look for these types:
- Ornamental grasses (miscanthus, pampas grass plumes, or feather grass) press beautifully and give a soft, feathery look
- Baby’s breath (tiny clusters lay flat and create a delicate scatter effect)
- Fern leaves or pressed eucalyptus leaves (they dry flat naturally)
- Lavender buds on the stem (they press well and leave a light scent)
- Small daisy or chamomile heads (flattened with a book before using)
I personally love using ornamental grasses because they have long, elegant shapes that wrap around the curve of a pillar candle. They also look completely different before and after pressing, which makes the transformation feel like magic.
Step by Step: How to Press Dried Flowers onto a Candle
Follow these steps carefully. The iron temperature is the most important factor. Too hot and you will melt the candle too fast. Too cool and the flower will not embed.
Step 1: Prepare your work area. Place the candle on a heat safe surface. Make sure the candle is clean and dry. If there is dust or lint, wipe it off with a dry cloth.
Step 2: Arrange the flowers on the candle. Lay your dried flowers or grasses on the wax exactly where you want them. Use tweezers to position thin stems or small petals. Do not press them in yet; just place them on the surface.
Step 3: Cover with parchment paper. Cut a piece of parchment paper large enough to wrap around the candle with some overlap. Lay it flat over the arranged flowers. Gently hold the paper in place so the flowers do not shift.
Step 4: Heat the iron. Set your iron to a low or medium low heat. I usually set mine to the polyester or silk setting, around 250 F or 120 C. Do not use steam. Wait for the iron to heat up fully.
Step 5: Press the iron over the parchment. Place the hot iron directly on the parchment paper over the first flower. Press down gently but firmly. Hold for 5 to 10 seconds. Lift the iron straight up; do not slide it or you will drag the flowers. Repeat for each section of the candle, moving the iron around the circumference. You will see the wax become slightly glossy as it melts under the paper.
Step 6: Check the result. Carefully peel back the parchment paper. The flowers should now be slightly embedded in the wax. If they are loose or look like they are sitting on top, press again for a few more seconds. If the wax has become too soft or started to drip, your iron was too hot; let the candle cool down before trying again.
Step 7: Cool and display. Let the candle sit for at least 15 minutes to harden. The wax will re solidify around the flowers, locking them in place. Your floral candle is ready to use or gift.
Before and After: What to Expect from This Floral Candle Transformation
Honestly, the first time I pressed grass onto a plain white candle, I did not expect much. I thought the flowers might just look stuck on. But when I lifted the parchment paper, the grass had turned a translucent golden color and looked like it had been painted into the wax. The before was a boring, plain pillar. The after was a candle with delicate natural lines that caught the light. The texture was smooth to the touch because the flowers sat slightly below the surface. I have also tried this with baby’s breath, and the tiny white dots created a starry effect. The transformation is not over the top; it is subtle and earthy. That is what makes it so special.
Tips for Best Results and Avoiding Common Mistakes
This technique is simple, but a few small mistakes can ruin your candle. Here are the things I learned the hard way:
- Do not use wax paper. It sticks to the candle and can tear, leaving paper bits embedded in the wax. Always use parchment paper.
- Test the iron temperature on a scrap piece of wax or a cheap candle first. If the wax melts too fast and drips, turn the heat down. If nothing happens, turn it up slightly.
- Use flat, dry flowers. Moisture in fresh flowers will cause steam and may crack the wax. Make sure your flowers are 100% dried.
- Do not press flowers that are too thick. They will not embed evenly and may leave air bubbles. Stick with thin, flexible pieces.
- If you want a layered design, press one layer at a time. Let the wax harden between layers to avoid smudging.
- Work in a well ventilated area. Heating wax can release a light scent, though it is usually not strong.
One more personal tip: I like to press flowers on the sides of the candle, leaving the top rim clean. That way the flame does not get too close to any dried plant material. Safety first.
Creative Variations: Beyond Plain Pillar Candles
Once you master the basic technique, you can experiment with different candle shapes and flower combinations. Try using colored candles for a bolder contrast. A dark blue pillar with white baby’s breath looks crisp and modern. You can also press herbs like rosemary or thyme for a kitchen themed candle. Another idea is to press a single large leaf, like a pressed fern, along the full height of a tall pillar. For smaller candles, use mini size dried flowers and get a more delicate look. I have even pressed dried orange slices (thinly cut and dried) onto a candle, and the orange color warmed the wax beautifully. The possibilities are endless, and each candle becomes a unique piece of decor.
If you want to give a handmade gift, press flowers onto a set of small votive candles. Wrap them in tissue paper and tie with twine. People always ask where I bought them, and I love saying I made them in ten minutes. This DIY floral candle method is one of those rare projects that looks harder than it actually is. It is a perfect weekend craft for anyone who loves dried flowers and simple handmade decor.
Give it a try and let me know how your candles turn out. I would love to hear which flowers you choose and how the before and after looks in your space.
#diyfloralcandle #driedflowers #candledecor #easydiy #flowercandle
This post was researched and drafted with AI assistance, then personally reviewed and edited by Diana before publishing.
Leave a Comment