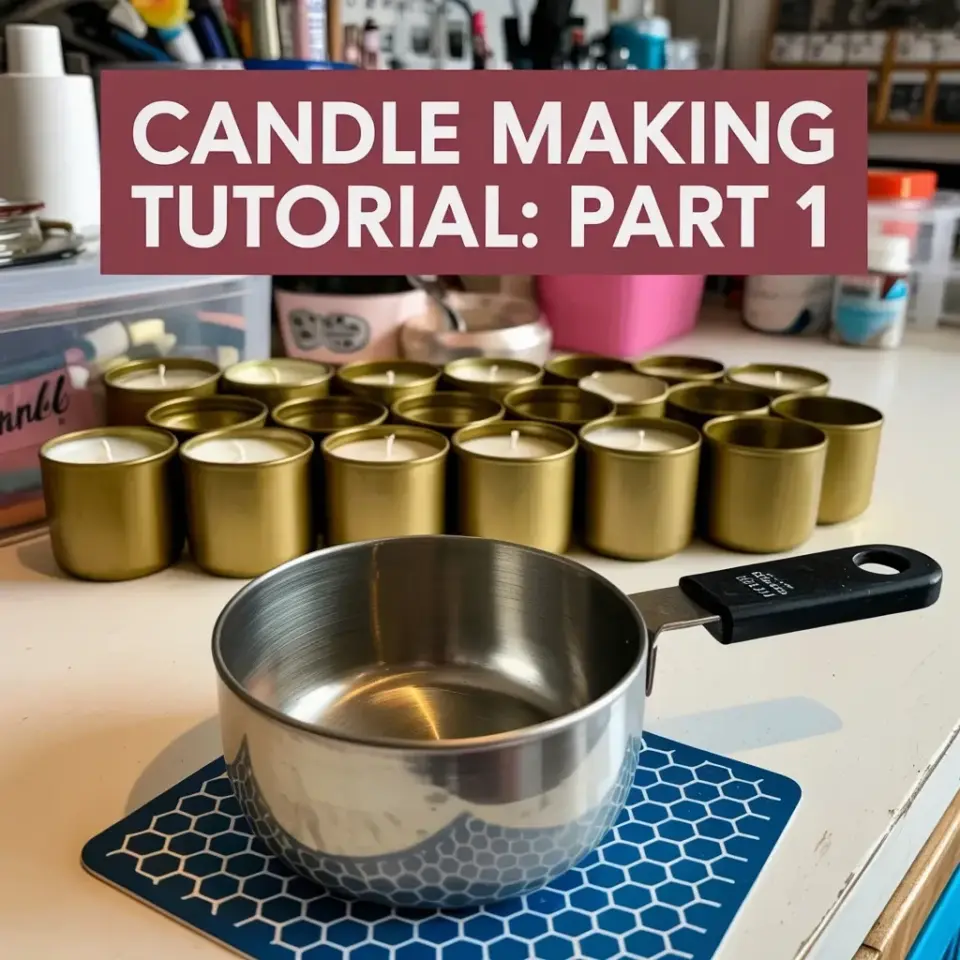
There are 15 empty gold candle containers sitting on my kitchen table in the photo above, arranged in two neat rows like little soldiers waiting for orders. The burgundy banner with white text clearly spells out Candle Making Tutorial Part 1, which feels official even though I’m just a regular person figuring this out at home. That silver measuring cup with the black handle, resting on the blue and white hexagonal trivet, is honestly my favorite piece of candle making supplies I own. I bought it on a whim, and it turned out to be the single best tool for pouring hot wax without making a mess.
Why Gold Candle Containers Won Me Over
I’ll be straight with you: I almost bought plain glass jars for my first batch. Then I saw a set of 15 gold candle containers on sale, and something clicked. They looked classy, a little glamorous, and way more expensive than they actually were. The outside is metallic and smooth, while the inside has plenty of room for wax and wicks. They catch the light nicely when the candle is burning, and that warm glow reflects off the gold finish. For less than the cost of a few lattes, I had containers that made my DIY candle making look intentionally designed.
One thing nobody tells you is that gold containers can show fingerprints more easily than matte glass. Not a big deal, just wipe them down before you pour. Also, make sure the containers are completely dry and clean before wax touches them. Any dust or moisture can mess with the adhesion and make the candle pull away from the sides later.
Essential Candle Making Supplies for Beginners
Ok so let’s talk about what you actually need before melting anything. It’s easy to get overwhelmed by all the fancy tools and fragrance oils out there, but you can start with a short list. I gathered my own candle making supplies based on what appeared in every serious tutorial I watched, then trimmed it down to the bare essentials.
- Wax (I use soy wax flakes for clean burns, but paraffin or coconut blends also work)
- Wicks with sticky tabs or wick stickers
- A pouring pitcher or metal measuring cup with a spout
- Thermometer (the instant read kitchen kind works fine)
- Fragrance oil or essential oil, if you want scented candles
- A heat source like a double boiler setup or a dedicated hot plate
- Your clean, dry candle containers
That’s it. You do not need a fancy presto pot or a massive melting tank for your first few batches. The measuring cup in the photo is a great example of simple candle making equipment that does the job. You heat the wax in it, pour it out, and cleaning takes two minutes with a paper towel.
Candle Making Equipment That Earns Its Place
Here’s the thing about candle making equipment: some of it is genuinely necessary, and some of it is just nice marketing. The thermometer falls into the genuinely necessary category. Wax temperature matters a lot, especially if you’re adding fragrance. If your wax is too hot, the scent evaporates. If it’s too cool, the fragrance won’t bind well and you get weak throw or that weird wet spot on the surface.
My silver measuring cup sits on that trivet for a reason. The cup gets hot, and the trivet protects your table or counter from scorch marks. I used to set it directly on a cutting board until I noticed a dark ring forming. So learn from me, get a trivet or a heatproof mat from the start. Also, that black handle stays cool while the metal part is hot, which is not true for all pitchers. I had a cheap aluminum pot with a metal handle and nearly burned my hand. Honestly, that experience alone convinced me to use a cup with a proper insulated handle.
Oh and the spout. The spout is the whole game. A measuring cup with a good spout gives you a slow, controlled stream. You can pour exactly where you want without drips running down the side. My first pour used a random bowl with no spout, and wax went everywhere. This is why the tools matter, not because you need a professional lab setup, but because they make the process less frustrating.
Setting Up the Workspace for Your First DIY Candle Making Session
Before you melt anything, cover your work surface. I used old newspaper for my first session, which worked but got soggy when a little wax spilled and mixed with the ink. Then I switched to a silicone baking mat, and now I use parchment paper. Both are better. You also want good ventilation, not because soy wax is toxic, but because fragrance oils can get strong when you heat them. Open a window and you’ll feel much better.
Lay out all your supplies before you start. Put the gold candle containers in a row, making sure they’re evenly spaced. This is also the perfect time to center your wicks. Yes, you can buy centering devices, but I’ve used a simple pencil laid across the container opening and wrapped the wick around it. Works perfectly almost every time.
Prepare for spills. Spills will happen. I had a small wax dribble run off the edge of the measuring cup and pool under the trivet. It was a pain to scrub off the table, but once it hardened, I just peeled it off with a plastic scraper. A dedicated scraper is a good addition to your candle making equipment arsenal. Also, keep paper towels nearby. Not some fancy branded towels, just the regular kind.
The Pouring Process, Explained by Someone Who Actually Poured
When the wax melts completely, check the temperature. For soy wax, the usual range is around 120 to 140 degrees Fahrenheit for pouring. But here’s the nuance: the exact temperature depends on your wax brand and the fragrance load. I usually aim for around 130. Wait until the wax is fully mixed and the fragrance is stirred in slowly, then pour gently into each gold container.
Pouring technique matters more than you think. Hold the spout close to the container and pour in a steady stream, not too fast. If you go too fast, air bubbles form and then they rise to the surface and leave craters. One of my first candles had a weird divot in the top because I poured from too high. Fill each container to just below the rim. Leave some space for the wax to settle and for the surface to level out. The wax will shrink slightly as it cools, so you might need a second pour later.
Let the candles cure and cool without moving them. I know it’s tempting to peek or tap the sides, but resist. Moving them while liquid can cause cracks and uneven tops. Leave them on the flat trivet or a level countertop for at least 24 hours. Some people wait 48 hours before burning them or putting on lids. Patience is the secret ingredient in this candle making tutorial, and it costs nothing.
Common Beginner Mistakes in DIY Candle Making
The biggest mistake I made was adding too much fragrance oil. The general rule is about 6 to 10 percent of the wax weight, but I went wild and used way more. The result was a candle that smelled great cold but burned with a smoky flame and poor scent throw when lit. Extra fragrance does not mean extra perfume in the air. It means a mess.
Another mistake is forgetting to test your wick size before committing. Different waxes and container widths need different wicks. A wick too small gives you a weak flame and tunneling. A wick too big causes that annoying black soot around the gold container. I still have one jar with a slightly too-large wick, and it leaves a sooty streak on the edge every time. It’s a good reminder to check a wick sizing chart before you pour.
Do not skip the test burn. Before you hand out all 15 candles as gifts, burn one from start to finish. That’s what I did, and I found out the scent throw was weak on one of my blends. So I adjusted the amount and the pouring temperature, and the next batch came out much better.
What’s Next in This Candle Making Tutorial Series
Part 1 is all about the setup, the supplies, and the containers. In the next part, I’m planning to dive into the actual melting and pouring process in more detail, including a step-by-step guide with specific temperatures and weight ratios. We’ll also talk about how to fix common problems like wet spots and sinkholes.
For now, get your gold candle containers, a decent measuring cup, a thermometer, and some quality wax. Lay everything out on a protected surface. Practice pouring water from your measuring cup into the containers just to get a feel for the flow. That sounds silly, but I did it, and it helped me pour without spilling when real hot wax was in the cup.
If you have a good local craft store or an online supplier you trust, buy small quantities first. Scent oils can be overwhelming, and there’s no point buying a liter of something you end up hating. Start small, take notes, and work through the process once from beginning to end. The next time will feel way more relaxed because you’ll already know how the wax moves, how long the cooling takes, and why that silver measuring cup is the helper you didn’t know you needed.
I’m excited for you honestly. There’s something deeply satisfying about creating a candle from scratch and watching it burn in a beautiful gold container. Save this post for your first batch, and come back when you’re ready for part two.
This post was researched and drafted with AI assistance, then personally reviewed and edited by Diana before publishing.
Leave a Comment