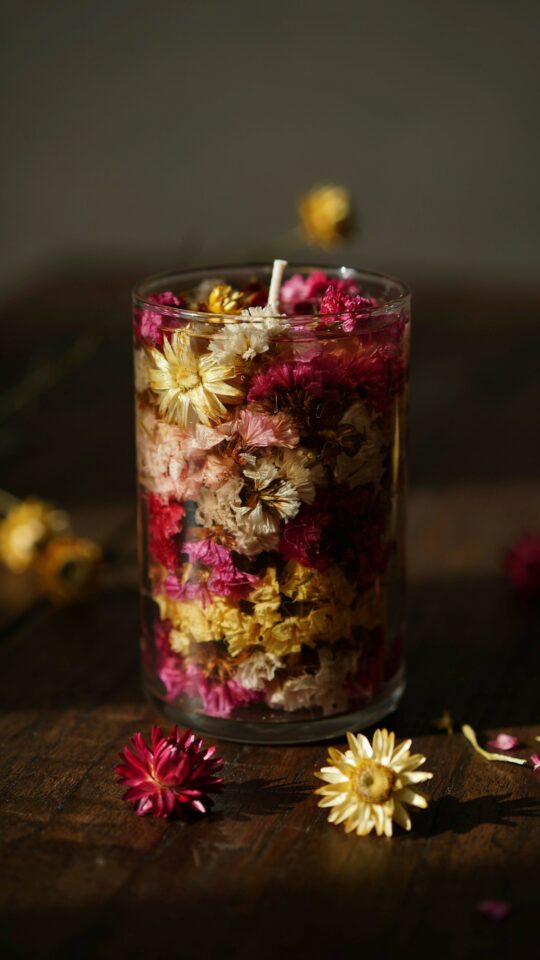
I still remember the first time I tried making a pressed flower candle. I was scrambling for a last minute Mother’s Day gift, and I had a jar of dried petals sitting on my desk from an old bouquet. That little project turned out so well that my mom actually asked me to teach her how to do it. A pressed flower candle looks delicate and fancy, but the process is surprisingly simple. You don’t need fancy tools or expensive materials. Just a plain candle, some dried blooms, and a little patience. It is one of those crafts that feels rewarding from the very first step.
Why Pressed Flower Candles Make the Perfect Mother’s Day Gift
Mother’s Day gifts should feel personal without being complicated. A handmade pressed flower candle hits that sweet spot. It shows you took time to think about her favorite colors and scents, and it doubles as spring home decor. Unlike store bought candles that get used up and forgotten, this one becomes a keepsake. The flowers stay preserved in the wax, so every time she lights it she will remember the afternoon you spent together crafting it. Plus, you can match the blooms to her garden or her favorite floral pattern. That little touch makes all the difference.
If you are short on time, you can even prep the pressed flowers a week ahead and assemble the candle in under an hour. That is why this DIY candle idea works for busy schedules too.
What You’ll Need for This DIY Flower Craft
Before you start, gather these supplies. Most of them you probably already have at home. Keep it simple and don’t overthink the list. Here is what actually worked for me:
- A plain pillar candle (white or cream colored works best, soy wax is ideal but paraffin is fine)
- Pressed flowers (dried for at least 3 to 5 days, see the next section)
- A spoon or a butter knife (for heating the surface of the candle)
- Wax paper or parchment paper (to protect your work surface)
- A heat gun or a hairdryer (on low setting, to gently warm the wax)
- A pair of tweezers (for placing tiny petals)
- A small paintbrush (optional, for applying a thin layer of melted wax over the flowers)
That is really all you need. No special glue, no fancy kits. The heat from the hairdryer is enough to bond the dried flowers directly into the candle surface.
Choosing the Right Flowers and Candle Base
Not every flower presses well onto a candle. Thin, flat petals work best. I have had great luck with pansies, violas, ferns, and small rose petals. Avoid thick, fleshy flowers like tulips or sunflowers because they tend to curl or leave lumps. Also, pick a candle with a smooth, even exterior. Ribbed or textured candles make it hard to apply the flowers smoothly. A standard pillar candle about 3 to 4 inches tall is a good size. You can also use a wide, short candle if you want room for a bigger design.
For color combinations, I like to stick with two or three shades. Pale pink with white fern leaves looks elegant. Yellow and purple creates a cheerful spring vibe. Let the flowers guide you, but keep it simple. Too many colors can look messy instead of charming.
How to Press Flowers at Home (No Special Equipment Needed)
You do not need a flower press. I use a heavy book and some paper towels. Place the fresh flowers between two sheets of paper towel, then put them inside a thick book. Stack a few more books on top and leave them for 3 to 5 days. Check after two days to make sure no petals are sticking. If you are in a hurry, you can use a microwave flower press (sold at craft stores) but honestly the book method works just as well. The key is to press them until they are completely dry and flat. Any moisture left in the petals will cause the candle wax to bubble or discolor over time.
One tip: press extra flowers. A few will inevitably break during handling, and having backups saves you from a frustrated trip to the garden. I always press twice as many as I think I need.
Step by Step: Applying Pressed Flowers to Your Candle
Now for the fun part. Work on a clean, flat surface covered with wax paper. First, arrange your dried flowers on the candle without any heat. Play around with the layout until it looks right. Then gently lift each flower one at a time. Use a spoon or butter knife that has been warmed under hot water (and dried) to lightly heat the area of wax where the flower will go. You do not want the candle to melt, just soften enough to stick. Press the
#PressedFlowerCandle #DIYCandle #MothersDayGift #CandleDecor #FlowerCraft
This post was researched and drafted with AI assistance, then personally reviewed and edited by Diana before publishing.
Leave a Comment