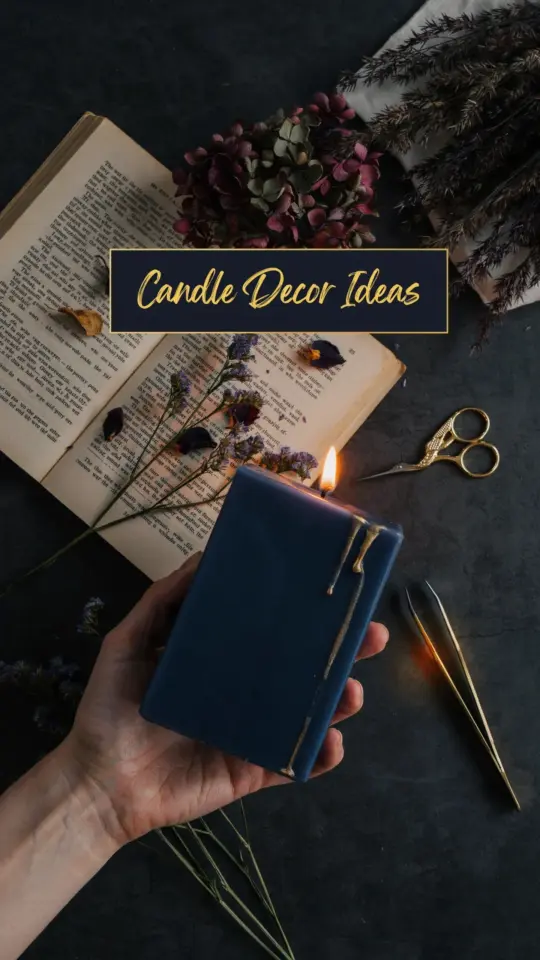
There is something quietly satisfying about making your own home decor, especially when it involves natural materials. A DIY floral candle brings together the warmth of candlelight with the delicate beauty of dried botanicals, and the process is simpler than most people think. Using an iron to press dried flowers onto wax creates a soft, romantic look that works in any room. Whether you are making one for your own coffee table or as a thoughtful handmade gift, this pressed flower candle project is a lovely way to spend an afternoon.
Selecting the best candles and flowers for pressing
Not every candle works well for this technique. Pillar candles with a flat or slightly curved surface are the easiest to work with. Thick taper candles can also work, but avoid thin or highly tapered shapes. Beeswax candles are a personal favorite because the natural honey scent pairs beautifully with floral decor, but plain white or cream paraffin candles show off the pressed flowers best.
For flowers, look for flat faced blooms. Pansies, violas, daisies, and small ferns press beautifully and lie flat against the wax. Baby's breath and lavender sprigs add a delicate, airy feel. Avoid thick or fleshy flowers like roses or succulents, as they hold too much moisture and will not press evenly. You can use store bought dried flowers or dry your own, which I cover in the next section.
How to dry flowers for candle decor at home
If you want to use fresh flowers from your garden or a market, drying them properly is essential. The simplest method is to place the blossoms between two sheets of absorbent paper inside a heavy book. Stack a few more books on top and leave them for 7 to 10 days. Thicker flowers may need up to two weeks. Check them after a few days to make sure no mold is forming.
For faster results, use a microwave flower press. Place the flowers between two ceramic tiles lined with parchment paper, microwave on low for 30 to 60 seconds, and let them cool completely before handling. This method preserves color well, especially for bright yellows and purples. Whichever method you choose, make sure the flowers are completely dry and brittle before you try to press them onto wax. Any remaining moisture will cause the candle to smoke or the flower to discolor.
Step by step pressed flower candle tutorial
Here is the core process that works every time. You will need your chosen candle, dried flowers, a household iron, a sheet of parchment paper, and a pair of tweezers. Clear a flat, heat safe surface before you begin.
- Heat your iron to a low or medium setting with no steam. A silk or synthetic setting works well. Let it warm up fully.
- Arrange the dried flowers on the candle surface. Use tweezers to place them gently, as dried petals are fragile. Keep the design simple at first, a single large bloom or a small cluster looks more intentional.
- Cut a piece of parchment paper large enough to wrap around the candle with some overlap. Fold it loosely around the candle over the flowers.
- Press the warm iron firmly over the parchment paper for 10 to 15 seconds. Do not slide the iron. Lift it straight up and check the flowers through the paper. Repeat if needed.
- Peel back the parchment carefully. The flowers should be slightly embedded into the wax. If they lift off, press again for a few more seconds.
Work on one small section at a time, especially if your candle has multiple sides. Rushing leads to burnt petals or uneven adhesion. Take your time and let the wax do the work.
Tips for arranging flowers on candles like a pro
The arrangement is where your personal style comes through. I like to choose one focal flower, like a large pansy or a single fern frond, and build around it with smaller blossoms. Leave some negative space so the design breathes. Covering the entire candle with flowers can look cluttered and makes the pressing step harder because the paper does not sit flat.
Consider the candle's color. White or cream candles make every flower color pop. Pale pink or blue candles work best with white or pastel flowers. Dark colored candles hide most flower detail, so stick to light or bright blooms if you choose a deep wax color. Also, think about the candle's purpose. If it will be a centerpiece, arrange flowers on all visible sides. If it sits on a shelf, one decorated side is enough.
Sealing and finishing your DIY candle decor properly
Once the flowers are pressed into the wax,
#DIYfloralcandle #pressedflowercandle #candledecor #flowercraft #homedecorideas
This post was researched and drafted with AI assistance, then personally reviewed and edited by Diana before publishing.
Leave a Comment