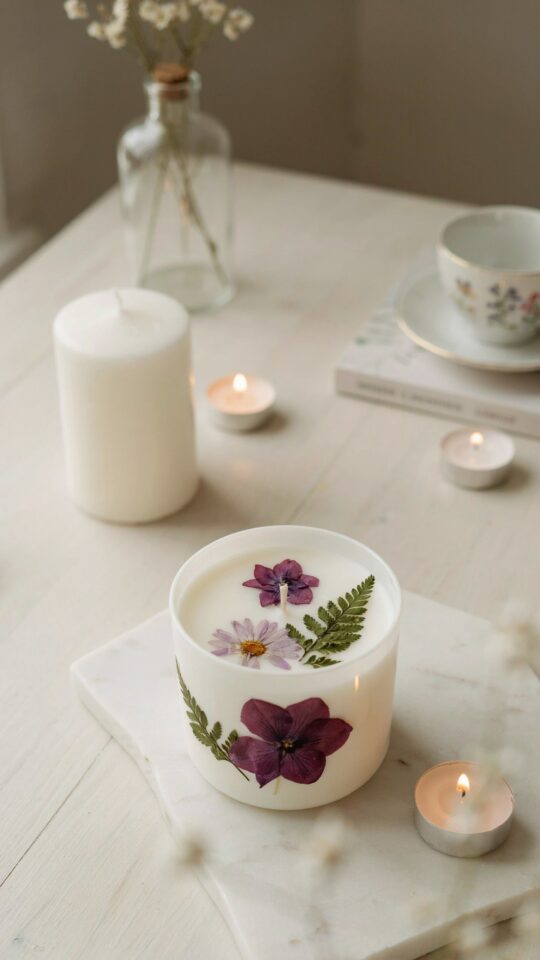
If you have been scrolling through Pinterest or Instagram lately, you have probably noticed that dried flowers are everywhere. They are not just for bouquets anymore. One of my favorite ways to use them is in DIY candledecoration because it is so simple, looks expensive, and fits every season. I started making these last fall and now I cannot stop. The best part is you do not need fancy tools. Just a plain candle, some dried blooms, and a bit of patience. Whether you want a romantic centerpiece for your dining table or a handmade gift that actually gets used, this craft delivers.
Best Dried Flowers for Candle Decoration
Not every flower works well when pressed into wax or glued onto a candle surface. I have learned the hard way that thick, woody stems just fall off. Stick to thin, flat petals and small blossoms. Here are my go to picks:
- Pressed rose petals (they keep their deep red or soft pink color nicely)
- Lavender buds (tiny and aromatic, perfect for a calm vibe)
- Baby’s breath (gives a delicate, airy look)
- Eucalyptus leaves (flat and easy to arrange)
- Cornflowers or chamomile (small round shapes add texture)
- Fern fronds (great for a woodland feel)
You can buy dried flowers from craft stores or dry your own. Just hang fresh flowers upside down in a dark, dry room for two weeks. That is what I do with garden roses in summer, and they last for months in a jar.
How to Embed Dried Flowers in Candle Wax
Embedding the flowers inside the wax gives a beautiful, translucent effect when the candle burns. This method works best with pillar candles or container candles where the wax is thick enough. You will need a heat safe tool like a tweezers and a small spoon. Heat the spoon in hot water (not boiling) or use a low heat embossing tool.
Press the dried flower gently onto the side of the candle. Then hold the back of the warm spoon against the flower for a few seconds. The wax melts slightly and the flower sinks in. Be careful not to push too hard or you will dent the candle. I like to embed flowers in a pattern, maybe a single rose petal every inch around the candle. Let the wax cool completely before moving the candle.
Pressing Dried Flowers into Soft Wax for a Seamless Look
Another technique is to press flowers into the surface of a candle that has been slightly softened by heat. This is perfect for taper candles or smaller pillars. Lightly warm the candle surface with a hairdryer on low, just until it feels soft to the touch. Place your dried flower on the wax and press it in with your finger or a flat tool.
The flower becomes fully flush with the surface, almost like it was painted on. I did this with tiny sprigs of lavender on a cream taper, and it looked like a high end boutique candle. Just keep the hairdryer moving so you do not create a hot spot that drips wax. This method is faster than embedding and works well when you are making several candles at once for a DIY homecraft project.
Using Glue or Decoupage for Surface Decorated Candles
What if you do not want to melt or soften the wax at all? No problem. You can simply glue dried flowers onto the outside of a candle. Use a clear, water based craft glue or a tiny dab of hot glue. Apply the glue to the back of the flower, not directly on the candle, to avoid mess. Press it onto the candle and hold for ten seconds.
This method is great for candles that are already finished, like store bought jars or tall tapers
#candledecoration #diymaking #driedflowers #homecraft #candledecor
This post was researched and drafted with AI assistance, then personally reviewed and edited by Diana before publishing.
Leave a Comment