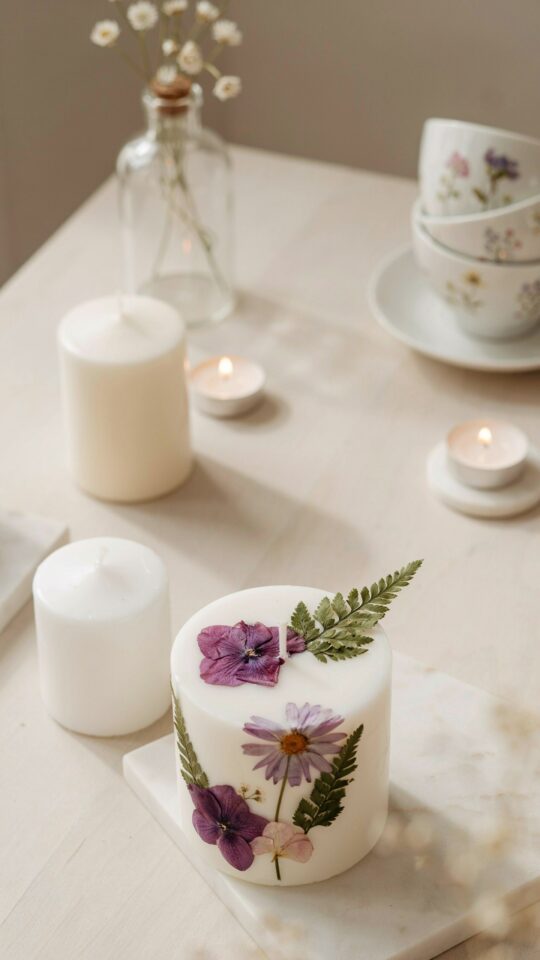
If you are looking for simple ways to make your home feel warmer without buying expensive store candles, these DIY candle decor ideas are exactly what you need. Making your own candles lets you control the scent, the shape, and the materials so everything matches your personal style. I have been making candles at home for years and I still love how a single handmade candle can change the whole mood of a room. In this guide I will walk you through the whole process from choosing wax to styling the finished pieces.
Choosing the right natural wax for your handmade candles
The wax you pick sets the foundation for your candle. Soy wax is my go to for beginners because it burns cleanly and holds scent well. Beeswax has a natural honey smell and burns longer but it costs more. Coconut wax creates a creamy throw and works beautifully with dried flowers.
For a simple project look for a container soy wax that comes in flakes. It melts evenly and does not require complicated measuring. Avoid paraffin if you want a truly natural look. The best part about natural wax is that spills clean up with just soap and water so you do not have to worry about messes.
How to prepare dried flowers and botanicals for candle making
Dried flowers add a beautiful, organic feel to candles but you need to prepare them right. Pressed flowers like baby’s breath or small lavender buds work best because they do not create air pockets. Larger petals like rose can burn if placed too close to the wick so use them sparingly near the sides of the container.
Before adding flowers to hot wax let them sit on a paper towel for a few hours to remove extra moisture. Moisture causes cracking and uneven burning. I like to arrange my dried flowers around the inside of the jar before pouring so they stay visible through the glass. A little patience here makes a big difference in the final look.
Step by step simple candle making technique for beginners
Here is the basic process I use every time. First melt your wax in a double boiler or a heat safe container set in a pot of simmering water. Do not heat wax directly on the stove because it can scorch. Use a thermometer to keep the wax between 160 and 180 degrees Fahrenheit.
- Prepare your container by attaching the wick to the bottom with a drop of hot glue. Center it straight.
- If you want fragrance add it when the wax cools to around 140 degrees. Stir gently for one minute.
- Pour the wax slowly into the container. Leave a half inch of space at the top.
- Let the candle set for 24 hours before trimming the wick to a quarter inch.
That is really all there is to it. Once you master this base method you can start experimenting with layers and embeds.
Creative ways to use containers and molds for candle decor
Think beyond standard mason jars. I have used old tea cups, small metal tins, and even ceramic espresso cups. The key is to pick containers that can handle heat. Glass jars from pasta sauce work great if you clean off the labels completely. Just make sure the glass is thick enough not to crack.
Silicone molds let you create shapes like stars or geometric blocks that sit on a dish. These are perfect for pillar candles you can move around. For a rustic look use a hollowed out citrus rind like an orange half. The citrus oil mixes with the wax for a subtle fresh scent. Just place the citrus on a heat safe plate before pouring.
Adding fragrance and color without overwhelming your space
Natural wax already has a mild pleasant smell so you do not need a lot of fragrance oil. Start with half a teaspoon of essential oil per one pound of wax. Lavender, eucalyptus, and vanilla are safe choices for cozy spaces. Stronger oils like cinnamon or clove can be irritating if you use too much.
For color use dye blocks made for candles or natural ingredients like beet powder or turmeric. Start with a tiny amount because colors deepen as the wax cools. Pastel shades look softer and blend better with dried flowers. Avoid liquid food coloring because it does not mix with wax and can create blotches.
Styling your handmade candles for cozy home ambiance
Once your candles are ready think about how you will display them. Group three candles of different heights on a wooden tray or a stack of old books. Place one near a reading chair and another on the mantle. Dried flower candles look extra pretty when set on a mirror or a marble slab so the botanicals reflect.
I always keep a few candles without lids on my coffee table so they become part of the decor even when unlit. If you are giving them as gifts wrap the jar in a piece of linen and tie it with twine. Add a small tag with the scent name and a burn time estimate. That personal touch makes a huge difference.
Common candle making mistakes and how to avoid them
The most common issue is tunneling where the wax burns down the middle leaving hard edges. This happens if the first burn does not melt the wax all the way to the edges. Let your candle burn for at least two hours during the first use. Another mistake is using too much fragrance which makes the
#DIYcandledecor #candlemaking #homedecor #handmadecandles #candlecraft
This post was researched and drafted with AI assistance, then personally reviewed and edited by Diana before publishing.
Leave a Comment