What Is a Cloudy Candle and Why It Fits This Season
If you have been scrolling through home decor feeds lately, you have probably noticed the soft, textured look of a cloudy candle. This is not a mistake or a flawed wax pour. It is an intentional finish that mimics the fluffy edges of a cumulus cloud. The cloudy candle works especially well for late winter and early spring, when we crave textures that feel airy and calm after months of heavy, dark decor. The raised bumps and uneven surface catch light differently than a smooth candle, giving your space a quiet, organic feel. And the best part? You can make one yourself with just a few basic candle making supplies, even if you have never tried making candles before.
Supplies You Need for This Beginner Candle Making Tutorial
Before you start, gather everything in one place. This keeps the process smooth and prevents you from scrambling while your wax is melting. For this beginner friendly project, you do not need expensive equipment.
- Soy wax flakes – natural soy wax works best because it cools slowly and holds texture well. Avoid paraffin blends for this technique.
- Candle wick – choose a cotton wick with a small tab, sized for your container. A 4 ounce tin works nicely.
- Container – a small glass jar, metal tin, or ceramic dish. Make sure it is heat safe.
- Fragrance oil – pick a light scent that matches the cloud theme, like cotton, fresh linen, or light lavender.
- Double boiler – a simple pot with a heatproof bowl on top works fine.
- Thermometer – this is not optional. You need to know the wax temperature to get the cloudy effect right.
- Rubber spatula or wooden skewer – for stirring and for creating the texture later.
- Wick holder – a pencil or chopstick works to keep the wick centered.
I recommend using a scale to measure your wax. Candles are about ratios, not volume. For a small 4 ounce container, you need roughly 3.5 ounces of wax flakes.
Step by Step: Creating the Cloudy Texture
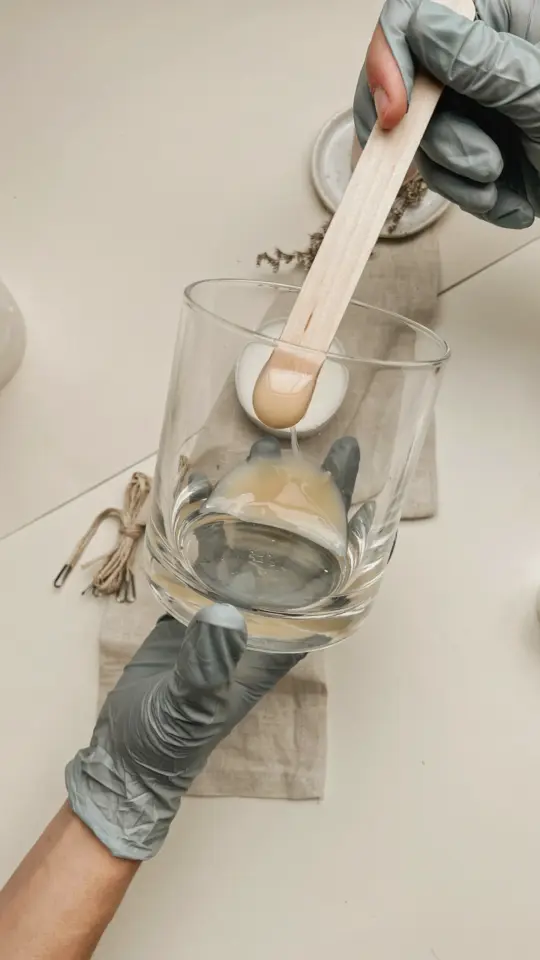
Melt your soy wax in the double boiler over medium heat. Stir gently until fully liquid. Remove from heat and let it cool to about 130 degrees Fahrenheit. Add your fragrance oil at this point, using roughly 6 percent of the wax weight. Stir slowly for one minute.
Pour the wax into your prepared container at around 125 degrees. Fill only halfway. Let it sit undisturbed for three minutes. Now comes the magic. Take your rubber spatula or a wooden skewer and gently press and drag the surface of the setting wax. Do not stir it in. Just push the wax upward in small peaks and swirls. The wax should be thick enough to hold shape but still soft. If it is too runny, wait another minute. If it is too firm, you can warm the container slightly with a heat gun (but carefully).
Keep working the wax for about two minutes, creating uneven ridges and bumps. Do not overwork it or the texture will flatten. Let the candle cool completely, which takes about four hours. Once solid, you will see a natural cloud like surface with soft shadows.
Tips for Choosing Scents and Colors
Because the cloudy candle texture is already visually busy, keep your scent and color simple. I prefer unscented or very light fragrances for this project. Heavy perfume oils can cause the wax to misbehave and create an uneven set. If you want color, use a tiny amount of liquid candle dye in a pale shade like blush, sky blue, or cream. Avoid dark colors because they hide the texture.
For a seasonal twist, try a fresh rain scent in a pale gray candle for spring, or a warm vanilla in off white for fall. The cloud effect looks especially good in neutral tones. You can also leave it pure white. White wax with a subtle pearlescent mica dust on top catches the light beautifully.
How to Avoid Common Mistakes with Soy Wax
Beginners often wonder why their cloudy candle ends up looking like a bumpy mess instead of soft clouds. The main culprit is temperature. If you pour the wax too hot (above 140 degrees), the texture will melt back into a flat surface. Pour too cold (below 110 degrees) and the wax sets before you can shape it. Stay in the 120 to 130 degree range for shaping.
Another mistake is using too much fragrance. Soy wax can only hold so much oil. Stick to 6 to 8 percent fragrance load. More than that and the wax gets soft and greasy, and the clouds will look oily rather than fluffy. Also, let the candle cure for at least 24 hours before burning. The texture becomes more defined as the wax stabilizes.
Styling and Displaying Your Handmade Decor
Cloudy candles look best in small clusters. Place three of them together on a tray with
#CloudyCandle #DIYCandle #CandleMaking #HandmadeDecor #BeginnerFriendly
This post was researched and drafted with AI assistance, then personally reviewed and edited by Diana before publishing.
Leave a Comment